How to Manufacture Steel Pipes Step by Step in 2026 requires more than listing machines. It requires understanding how heat, pressure, chemistry, and inspection shape a reliable product. The central question is: what is the manufacturing process of steel pipes? In practical terms, it begins with steel slabs, coils, or billets. These materials are prepared, heated, formed, welded or pierced, sized, and tested.
Metallurgist John D. Verhoeven wrote, “Steel is an alloy of iron and carbon, with other elements added to achieve specific properties.” This principle guides every production decision. Carbon content affects strength. Alloying elements influence corrosion resistance and toughness. Temperature control affects grain structure. Small errors can create serious defects.
For welded pipes, a steel strip is uncoiled and gradually shaped into a round tube. The edges meet under controlled pressure. High-frequency or submerged-arc welding then creates the seam. Excess weld metal is removed. The pipe passes through sizing rolls, where diameter and straightness are corrected. Seamless pipes follow another route. A heated billet is pierced by a rotary tool, then elongated and reduced through several rolling stages.
The process is precise, but not perfect. Scale, ovality, incomplete fusion, and surface cracks may still appear. That is why manufacturers use ultrasonic testing, hydrostatic testing, dimensional checks, and visual inspection. I have found that production teams often focus heavily on speed. They should not. A faster line is useless when rejected pipes increase.
This guide follows each stage in 2026, including automation, traceability, energy efficiency, and quality control. It also examines practical weaknesses, because real manufacturing rarely behaves like a clean diagram.
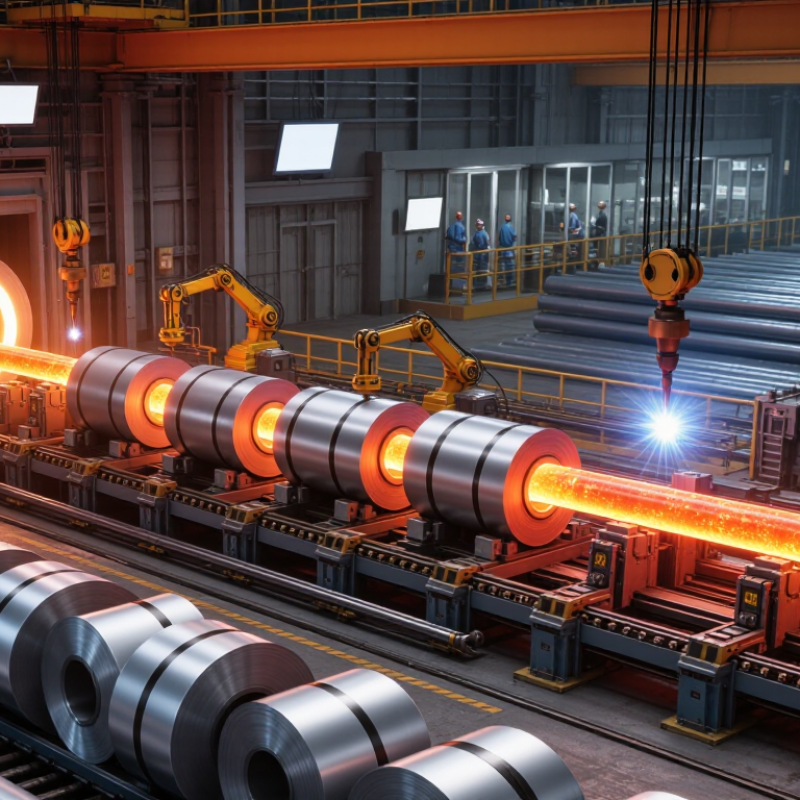
Raw materials determine the reliability of every steel pipe. Manufacturers usually select carbon steel or low-alloy steel coils according to pipe grade, diameter, wall thickness, and service conditions. Each coil should arrive with traceable certificates, heat numbers, chemical analysis, and mechanical test results. Inspectors also check coil width, thickness, weight, and visible surface defects before production begins.
Surface condition matters greatly. Rust, laminations, oil residue, and edge cracks can become serious weaknesses during forming and welding. A practical inspection combines calibrated gauges, visual checks, and non-destructive testing when required. Do not trust paperwork alone. I have seen clean-looking coils hide small edge damage after uncoiling. No inspection is perfect.
The coil is then stored on stable supports, protected from standing water and harmful contamination. Poor storage can create corrosion before the material reaches the forming line. During preparation, operators secure the coil, verify its identification, and feed it slowly into the uncoiler. Leveling removes coil memory and reduces uneven stress. Edge trimming may follow when the strip width is inconsistent or damaged. The trimmed edges should remain uniform, because irregular edges can disturb welding alignment. A short trial run helps confirm strip tension, flatness, and tracking. Small adjustments matter. Records should capture inspection results, equipment settings, and any rejected sections for later review.
Steel pipe production commonly begins with low-carbon steel coil. The coil is inspected, uncoiled, cropped, leveled, and joined before forming and welding. The chart shows representative upper composition values by mass for low-carbon steel coil used in welded pipe production; iron makes up the balance.
Process sequence: Receive and inspect coil → Uncoil and level strip → Crop damaged ends → Join coil sections → Form the strip into a tube → Weld the seam → Size, test, cut, and finish the pipe.
Forming steel strips into pipe shapes begins with careful coil preparation. Technicians inspect the strip for rust, dents, uneven thickness, and edge damage. The coil is then uncoiled and cut into narrower strips with controlled width. Small errors here can create serious problems later.
The strip enters a sequence of forming rolls. Each roll gradually bends the flat steel, rather than forcing it into a tube at once. This reduces cracking and keeps the shape stable. The edges approach each other along the centerline. Precise alignment matters. Even a slight offset can produce an uneven weld or weak seam.
The joined edges are heated and welded continuously. Sensors monitor temperature, speed, pressure, and weld appearance during production. After welding, sizing rolls correct the diameter and improve roundness. Cutting equipment then separates the pipe into specified lengths. Operators check wall thickness, outside diameter, straightness, and seam integrity. Visual inspection alone is not enough.
Practical experience still matters in 2026. Automated controls can detect patterns, but they may misread unusual surface marks. A skilled operator reviews the data and investigates the physical pipe. The process is efficient, but not perfect. Roll wear, material variation, and changing temperatures can affect results. Regular calibration and honest defect reporting help prevent small forming errors from becoming costly failures.
How to Manufacture Steel Pipes Step by Step in 2026
Steel pipe production begins with carefully prepared strip or plate. Operators check thickness, surface condition, and edge alignment before forming. The material passes through shaping rolls, which gradually create a round profile. Uneven forming can create stress near the future weld. Small flaws matter.
Welding joins the edges under controlled heat and pressure. The process must match the steel grade, wall thickness, and pipe diameter. Skilled technicians monitor temperature, speed, current, and shielding conditions. I have seen a clean bead fail after poor edge preparation. That mistake is expensive and avoidable. Weld inspection may include visual checks, dimensional measurements, and suitable non-destructive testing. Records should identify the operator, settings, and inspection results.
Seam treatment removes external irregularities and improves the pipe’s usable surface. Grinding must be controlled, because excessive removal can weaken the joint. Internal treatment may require careful tooling and adequate lighting. Pipe sizing follows welding and seam correction. Sizing rolls restore roundness and hold the specified outside diameter. Measure twice. Gauges should be calibrated and checked during production, not only at the end. Straightness, wall thickness, ovality, and end squareness also need attention. A pipe can meet its diameter target yet fail another requirement. That possibility deserves a second review. Reliable production depends on repeatable settings, trained judgment, and honest documentation.
| Step | Manufacturing Stage | Typical Process Data | Quality and Inspection Controls | Key Safety Considerations | Main Result |
|---|---|---|---|---|---|
| 1 | Material Selection and Incoming Inspection |
Use carbon steel, low-alloy steel, or stainless steel strip or plate according to the required pipe specification. Typical wall thickness: 2–25 mm for common welded pipe applications. |
Verify material grade, heat number, thickness, width, surface condition, and mill certificates. Check chemical composition and mechanical properties against the purchase specification. |
Use certified lifting equipment, edge protection, gloves, and protective footwear when handling coils or plates. | Approved raw material with full traceability. |
| 2 | Uncoiling, Cutting, and Edge Preparation |
Uncoil strip and level it before forming. Trim or mill the edges to remove laminations, burrs, and damaged material. Edge angle and root gap are set according to the welding procedure. |
Measure strip width, flatness, edge squareness, and surface cleanliness. Remove oil, scale, moisture, and loose rust from the weld area. |
Keep personnel outside coil-payoff zones and use guards around rotating equipment and powered cut-off tools. | Clean, dimensionally controlled strip ready for forming. |
| 3 | Pipe Forming |
Form the strip progressively through forming stands or press-forming equipment. Control forming pressure, roll alignment, strip tension, and pipe diameter to prevent excessive residual stress. |
Monitor outside diameter, ovality, alignment, and edge position continuously. Inspect for buckling, cracks, deep roll marks, and excessive distortion. |
Install guarding around pinch points and never reach into moving forming stands. | Open seam or closed tubular shell with controlled geometry. |
| 4 | Welding the Longitudinal or Helical Seam |
Select a qualified welding process such as high-frequency electric resistance welding, submerged arc welding, or gas-shielded arc welding. Set current, voltage, travel speed, heat input, electrode or wire feed, and shielding conditions according to the approved welding procedure. |
Maintain stable penetration and fusion along the complete seam. Check weld appearance, continuity, undercut, porosity, lack of fusion, and misalignment. Welding procedures and operators should be qualified for the applicable code or specification. |
Use welding screens, electrical grounding, fume extraction, flame-resistant clothing, eye protection, and hot-work controls. | Continuous welded pipe with a longitudinal or helical seam. |
| 5 | Weld Seam Treatment |
Remove external weld reinforcement by scarfing, grinding, machining, or controlled trimming when required. For internal weld bead removal, use internal scarfing or machining where the design and pipe diameter permit. Avoid excessive metal removal that could reduce wall thickness below specification. |
Inspect the treated seam for smooth transition, undercut, gouging, cracks, and remaining sharp edges. Measure local wall thickness when material has been removed. |
Control sparks, grinding dust, noise, and hot metal. Use face shields, hearing protection, respiratory protection, and spark containment. | Weld seam with an acceptable profile and surface condition. |
| 6 | Heat Treatment or Thermal Conditioning |
Apply normalizing, stress relieving, or other specified heat treatment when required by the material grade, wall thickness, or product standard. Furnace temperature, holding time, and cooling rate must follow the approved procedure. |
Record furnace temperature and time with calibrated instruments. Verify hardness, tensile properties, yield strength, elongation, and microstructure when required. |
Restrict access to hot zones and use heat-resistant tools, clothing, and warning barriers. | Pipe with controlled metallurgical properties and reduced residual stress. |
| 7 | Pipe Sizing and Straightening |
Pass the pipe through sizing stands to achieve the specified outside diameter, wall profile, and roundness. Typical dimensional controls include diameter tolerance, ovality, straightness, and end squareness. |
Measure diameter with calibrated gauges or laser systems. Check ovality, straightness, wall thickness, seam alignment, and end deformation at defined intervals. |
Guard rotating rolls and drive units. Use lockout procedures before maintenance or roll changes. | Pipe with stable dimensions and improved straightness. |
| 8 | Cutting to Length and End Finishing |
Cut pipes to the ordered length using cold saws, abrasive saws, plasma, or other approved equipment. Apply plain-end, beveled-end, threaded, or grooved finishing as specified. |
Check length, end squareness, bevel angle, root face, burr removal, and surface condition. For beveled ends, verify dimensions with a suitable bevel gauge. |
Protect operators from flying chips, sparks, sharp edges, and moving cutting equipment. | Individual pipes with finished ends and specified lengths. |
| 9 | Non-Destructive Testing | Use inspection methods appropriate to the product specification, such as ultrasonic testing, radiographic testing, eddy-current testing, magnetic particle testing, or liquid penetrant testing. |
Examine the full weld length or defined inspection zones for cracks, lack of fusion, incomplete penetration, inclusions, and other discontinuities. Calibrate equipment and record test results for each heat or pipe batch. |
Apply radiation controls for radiographic testing and electrical, chemical, or magnetic-field precautions for other methods. | Documented evidence that the pipe meets the specified internal and surface quality requirements. |
| 10 | Hydrostatic or Pressure Testing |
Fill the pipe with water and remove trapped air before pressurization. Test pressure and holding time are determined by the applicable product standard, design pressure, diameter, and wall thickness. |
Inspect for leakage, sweating, permanent deformation, and pressure loss during the test. Use calibrated pressure gauges and maintain a complete test record. |
Establish an exclusion zone and use shielding where necessary. Never stand in front of pipe ends or fittings during pressurization. | Pipe verified for pressure integrity. |
| 11 | Surface Cleaning and Protection |
Remove scale, oil, moisture, and contaminants by brushing, blasting, chemical cleaning, or other approved methods. Apply temporary corrosion protection or a specified coating system when required. |
Check cleanliness grade, surface profile, coating thickness, adhesion, curing condition, and holiday defects where applicable. | Control abrasive dust, coating vapors, compressed air, and chemical exposure with ventilation and suitable personal protective equipment. | Clean and protected pipe surface ready for storage or service. |
| 12 | Final Inspection, Marking, and Packaging |
Confirm outside diameter, wall thickness, length, straightness, end condition, weld condition, and surface finish. Mark grade, size, heat or batch traceability, inspection status, and applicable standard as required. |
Review material certificates, welding records, dimensional reports, NDT results, pressure-test records, and nonconformance reports before release. | Secure bundles with appropriate straps, use chocks to prevent rolling, and maintain safe crane and forklift routes. | Accepted, traceable, and properly packaged steel pipes ready for shipment. |
Note: Actual dimensions, welding parameters, inspection methods, acceptance criteria, and test pressures must be established by the applicable product standard, engineering design, and approved manufacturing procedures.
Steel pipe quality is shaped in the heat-treatment furnace. After forming and welding, operators control heating rate, soaking time, and cooling speed. Carbon steel pipes may be normalized to refine grain structure. Higher-strength grades often require quenching and tempering. Each batch needs furnace charts, surface checks, and hardness measurements. Uneven cooling can create residual stress, even when the pipe looks perfect.
The World Steel Association reported about 1.88 billion tonnes of crude steel production in 2024. This scale makes process control essential, not optional. Testing normally includes tensile strength, yield strength, elongation, chemical analysis, and impact performance. Hydrostatic testing checks pressure resistance. Ultrasonic or eddy-current inspection can reveal hidden weld defects. Dimensional inspection measures wall thickness, ovality, straightness, and pipe length. ISO 3183 and related technical specifications require documented acceptance criteria and traceability.
Tips: Keep one heat number with every test record. Calibrate gauges before production starts. Inspect the weld zone closely, especially near pipe ends. A practical weakness remains: sampling can miss a local defect. Full-length non-destructive testing improves confidence, but it does not replace skilled review. Inspectors should compare digital readings with physical evidence, then record any uncertainty instead of hiding it. Calibration certificates, furnace logs, and rejected samples should remain available for independent audits.
After forming and welding, steel pipes enter a demanding surface-finishing stage. Operators remove weld spatter, scale, and sharp edges with controlled grinding or shot blasting. The selected method depends on steel grade, wall thickness, and required surface condition. Excessive grinding can reduce wall thickness, so experienced workers check the area repeatedly.
Cleaning follows finishing. Pipes may receive degreasing, rinsing, drying, or protective coating, depending on their intended service. Inspectors examine the surface under strong lighting and measure critical dimensions with calibrated tools. Small scratches are easy to miss. They can become serious corrosion points later. Surface results are not always perfectly uniform, and this deserves honest review.
Cutting equipment then produces the specified lengths. Cold saws usually provide clean ends, while other methods may create heat-affected areas. Each cut is checked for length, squareness, burrs, and deformation. The final packaging stage protects the pipes during lifting and transport. Workers use separators, bands, end caps, and moisture-resistant materials when needed. Bundles receive clear identification, including size, grade, quantity, and inspection status. A rushed label can cause costly confusion. Even a well-finished pipe needs careful handling.
Manufacturers usually choose carbon steel or low-alloy steel coils. Selection depends on grade, diameter, wall thickness, and service conditions.
Each coil should have traceable certificates, heat numbers, chemical analysis, and mechanical test results. Paperwork helps, but it is not enough.
Inspectors check width, thickness, weight, and visible defects. They also look for rust, laminations, oil residue, and edge cracks.
Coils should rest on stable supports, away from standing water and contamination. Poor storage may create corrosion before forming begins.
Operators verify identification, secure the coil, and feed it slowly into the uncoiler. Leveling reduces coil memory and uneven stress.
Edge trimming removes inconsistent or damaged strip edges. Uniform edges help maintain welding alignment during forming.
Operators remove weld spatter, scale, and sharp edges through controlled grinding or shot blasting. Excessive grinding can reduce wall thickness.
Inspectors examine surfaces under strong lighting and measure critical dimensions. Cut ends are checked for length, squareness, burrs, and deformation.
Workers may use separators, bands, end caps, and moisture-resistant materials. Bundles need clear size, grade, quantity, and inspection-status labels.
Small scratches or hidden edge damage may escape detection. No inspection is perfect. Honest review remains necessary.
This article explains what is the manufacturing process of steel pipes, from the preparation of raw materials to the delivery of finished products. It begins with selecting suitable steel coils, checking their quality, and preparing them for production. The coils are then uncoiled, leveled, and cut into strips before being gradually formed into a round or specified pipe shape. The edges are joined through welding, followed by seam treatment and sizing to achieve accurate dimensions and a uniform structure.
The next stages include heat treatment when required, along with pressure, dimensional, visual, and weld inspections to verify strength and reliability. After passing quality checks, the pipes may receive surface cleaning, coating, or other finishing processes. Finally, they are cut to the required lengths, marked for identification, bundled safely, and packaged for storage or shipment. This step-by-step workflow helps ensure that steel pipes meet project specifications, production standards, and consistent performance expectations.

Flowtera Pipe